Thursday, July 22, 2010

Reconditioned Spring-A-Grab Handle...

It's all about little victories with "Louise".  I like to tackle the little stuff while doing the big things. One reason is to to take my mind off of being bogged down on a big project. The other reason is to have stuff like this done when it comes time to button everything back up. 

As you can see our Bargman Spring-A-Grab handle shown below is in real rough shape. The crappy pot metal these things are made of don't hold up real well. The thin chrome job they were given chips and flakes off exposing the metal below that quickly starts to oxidize and begins to pit badly. This isn't something that can be buffed out of the chrome. The chrome is basically gone. I would love to get these original pieces re-chromed but that may be a huge waste of money. Besides a few pieces sent to the chrome shop would be out of our budget. I thought I would paint instead. 

The picture of the handle prior to hitting it with a wire wheel to remove the flaking chrome and scuff the surface...
After wire wheeling the hell out of it and hitting a few spots with some heavy sand paper I cleaned and sprayed the first coat of primer. You can see that I am using Duplicolor Self Etching Primer. I thought I would give Duplicolor a shot even though it is a little bit pricey Vs something like Krylon. I would think of using Rustoleum if I hadn't used Duplicolor. I have had good luck in the past with some of Rustoleum  products but went with a the Duplicolor because they spray well and seem to look real good. I'm not sure about durability but we will get into that more later...
You can see here that it the pitting looks like the surface of the moon...
The pitting is so bad that a filler is needed. I thought for a bit that I could use a Filler Primer but it was really just that bad so I used Bondo's Glazing & Spot Putty. The stuff works real well. Just spread it on and sand it down. Once you sand smooth just go ahead and prime with a regular primer. I went back and forth sanding and priming until I figured it would be fine to spray the top coat...
I used Duplicolor's Chrome paint. It laid down real nice. I can't rally complain. It looks pretty good for a rattle can paint. I could have done better with the filling and sanding the primer to give me a smoother overall finish. One reason is I didn't because it started out as a test to see if the process would work. Second is that it is just a stupid grab handle...


Here is my big reservation... I hope it holds up for a few years. No chrome paint is ever real tough. I'm just hoping that it isn't a chipped and cracked mess in a couple seasons. Time will only tell. At this point I'm pretty happy with the outcome. The Bargman licence plate light will soon get the similar treatment. I believe that the interior lights will also. Stay tuned for those.

Friday, July 9, 2010

Little Progress...

It has been entirely too long since my last post. I have been working here and there but it seems to be REAL slow going at this point. I also have to say that I am TIRED of working on windows. It is becoming a real drag to work on them. I have pulled the front window and that thing is a bear. I am almost done wet sanding that and will be moving on to polish. I'm very ready to do other things. But here is my update...

Here are the curbside Jalouise window and the "kitchen" Jalouise window screens. I polished these up and fit new screen material and splines. It isn't a real WOW picture but it is progress...


I was finally able to get the kitchen window back together today. It had been polished but I needed to get a time when Molly and I could sit and rivet the mechanisms back together. I need someone to hold the pieces while I hammer them back together. Having a rambunctious two year old in the house makes it terribly tough to sit and get stuff like that done. However, the kitchen window is now crossed off the list...

Just some detailed shots...

The newly riveted mechanisms look and more importantly work so much better than before. You would be surprised how much those old steel rivets would bind up the operation. I also dig out all of the old dirty grease from the torpedo opener's gears. I add new grease and it seems to help also...

New seals for the window. Look at that crud built up in the window. Looks so much better now...


That is it for now. Nothing major but I can cross it off the list. 

On a side note... the Vintage Shasta Trailer Forum is doing very well lately. A LOT of new members showing up with newly purchased Shastas. I have been having to devote more and more time over there. That is a good thing but taking time away from restoration. But I guess that is a good thing. 

Monday, May 17, 2010

Reproduction Shasta Plate Available For PreOrder...

I contacted Steve from Vintage Trailer Supply a little while ago to see if he would be interested in reproducing the green factory nameplates that Shasta put on their trailers. The nameplates indicated which factory the trailer was assembled at and the address of that factory. I sent Steve my original name plate and he was able to get it in the reproduction process. I got to hand it to him. The plate artwork looks spot on...
The plates are not in stock yet. They are still being produced. Steve said they would be a few weeks out. However you can sign up to be notified when they are done. Go to the link below and click "Email Me When In Stock". You will receive the email when they are available. The current price is $12.99.

At this time VTS is just doing the Goshen, IN plant because that is the plate I sent him. If you have a plate from another factory and would like to have it reproduced. Get in contact with Steve and send him your plate.  He will most likely give you a reproduction plate for your troubles. He is interested in doing the other factory plates but needs a original example to get it accurate.

Follow the link to the nameplate page...
VINTAGE TRAILER SUPPLY SHASTA NAMEPLATE- GOSHEN, IN

Thursday, May 13, 2010

Ironing Board Update...

My suspicions were on track and THIS is in fact a ironing board storage bracket. A few folks were nice enough to point it out and give me the info I needed. VSTF member Distant75 sent me some additional info...
Here are the measurements he sent me...

I hope to reproduce this item for our trailer at some point. It is one of those original features that makes the Shasta a Shasta. Again, not a critical item but hey, I think it is a feature from a bygone era. You don't usually see a ironing board in a 16 foot trailer now a days. Not exactly looking forward to ironing my slacks at a State park or anything like that. I hope this helps another owner recreate their ironing board if they wanted to.

Thursday, April 29, 2010

Curb Side Jalouise Window Part 2...

Made more progress and was able to get the window riveted and back together...

I ordered new aluminum DF11-10-ST rivets from Hanson Rivet & Supply Co. I have to say thank you to VSTF member Joek for the information on which rivets to buy. They are spot on and were a needed replacement.  I bought the overpriced squeezer dies from Hanson to set the rivets but didn't get the hand tool to put the dies in. Those tools are CRAZY expensive and I didn't want to blow more budget on something like that. Having done a bit hand riveting while leather working I knew I could do it with a hammer. The softer aluminum rivets are pretty easy to set unlike something like a steel rivet. I just took the bottom die and placed it in a mini vice I have. The other die got stuck into a socket screwdriver that was just about the right size. I set one on my own and it worked fine. The problem was I needed another hand to hold the part while I held the screwdriver and hammer. I roped Molly into the project and she became that third hand. She was a good sport about it and was a big help. The rivets were pretty easy to get to roll and flare. 

Here you can see the steel rivets the Hehr factory put in their windows and the new replacement rivets in the cleaned up parts. You can see some pitting on these parts still remains but overall they look a hundred times better...
Here you can see the right side (as you are looking at it from the outside) with the new felt weather strip installed. 8 rivets per side. Some advice for anyone out there taking their Jalouise windows apart: Take pictures before you take it apart. That way you know how to put it back together. It can get a bit confusing and you don't want to have to drill out rivets you just set...

Here is the outside of the window. As you can see the steel rivets are done and barely holding on. Shined up and new aluminum rivets now set. They will probably last longer than the trailer...
Here is the whole window before and after. The after is missing the insect screen in the picture...
Here you can see the bulb seal and the felt strip weatherstrips...
Just some details. The window works so much better and I'm not so worried about breaking the opening mechanism gears...
And thats really is about it. I have been saying that I will do a in depth step by step for folks that want to redo their Jalouise but that process is pretty time consuming. I just want to keep moving on with the project. Thats it for now.

Ironing Board Storage Bracket???


Alright boys and girls...

What the heck is this. Is it a storage area for one of those cutting-board-slot-mounted-ironing boards?

This is in the back of my long cabinet on the curb side. I am wondering if it is factory. I know some trailers came with the ironing board that slid into the cutting board slot. The bracket looks pretty decent in it's construction like it could come from the factory. The bracket rotates on the one mounting screw. Whatever it secures would be flat enough to sit against the back of the cabinet. There appears to be a slot in the bottom of the cabinet that would accept something like a board.

I dunno. Anyone have an original ironing board the could measure? If I have the measurements for one of the ironing boards I think I could determine if it is mounted in the right place to fit one in. I'm really curious about this.

Wednesday, April 28, 2010

Curb Side Jalouise Window Part 1...

I had a pretty good day today. I pulled the "kitchen" Jalouise window and a few drip caps to get polished. I also removed a lot of the stuff from inside the trailer. I pulled the interior lights, bunk brackets, and started removing the cabinet doors. Nothing major but it really gives you a idea of what you need to wrap you head around and concentrate on. I hope to soon sand and re-shellac the cabinet doors and drawer fronts. It isn't mission critical but something that can take awhile and there isn't reason to rush a project like it. I'm still tackling one thing at a time.


Ultimately, I still need to find a shelter to get the trailer in so I can really dig into it. I can't move ahead with pulling some of the skin back and repairing some of the rot. Opening up the trailer to get things repaired to move ahead with the projects needs to happen at some point. My painting process itself will take a few days itself. I have been trying to track down one of those portable shelters that I can store it under. Most I find on Craigslist are too small, junky, or not tall enough. Cheap is the name of the game here. I don't have a budget that I can just go to a supplier like Shelter Logic and buy one so I have been scouring Craigslist trying to find a used one that works. I will keep everyone in the loop on that side project.


Back to the restoration...


Here is the curb side Jalouise window. I pulled this window a while ago. You can see most of it in that jumble of parts I showed you before. I pulled it apart to really give it a good polish. Unfortunately you can't do that when the window is whole. One of the downsides of these windows is the the were assembled with steel tubular rivets. The rivets on my Jalouise widows are almost completely gone. I will be replacing them with aluminum rivets. The level of oxidation of the aluminum was surprising also. I really wasn't expecting what I found. There was quite a bit of pitting on some parts like the lower sill. The rubber seals were hard and brittle and there was hardly any pile left on the strips. Everything will also get replaced. Here is the window straight from the trailer...
I really didn't take too many shots of the window before I disassembled it. Everything got the wet sand and polish treatment. I am still loving that buffer. It does a great job on these thicker frame pieces...
Good looking stuff...
Here are the glass holders and rods....
And thats it for now...

I did get my new rivets. Now I just have to set them, reinstall the seals, and reassemble the window. Look for a part 2 soon.

Monday, April 19, 2010

More Shiny Stuff...

Not a huge post today but sometimes it's the little stuff that counts...

I finished up some of the window trim today. Here you can see the small bathroom window interior trim (inner), the curbside Jalouise window insect screen frame (middle), and the curbside Jalousie window interior trim (outer)...

They turned out alright even though the 6" bench buffer likes to grab these really thin pieces and try to turn them into pretzels. I learned a small trick to take a long thin piece of 3/4" scrap plywood and hold it in inside the 90 degree angle to support the thin frame. This allows you to put some pressure on the piece without bending it. This also doesn't allow the wheel to grab the edges of the trim. I did have a few times before the wooden support where the buffer would yank the trim and damage it. Oh well. Live and learn I guess. 

Here is then curbside Jalouise window drip rail and the small bathroom drip rail. The side by side of the before and after really shows how the wet sanding along with the new buffer really does a nice job...


I have actually crossed this pile of parts off of my polishing list. I am just waiting for my new rivets to come so I can can put my Jalouise window back together. I hope they come in a day or so. They better. I'm getting worried. Anyway... I will update this when they do finally show and I'm able to get it back together.

Sunday, April 18, 2010

Hehr Bathroom Window Resto...

I managed to knock another window of the list today.

The Hehr Standard pop-out bathroom window really wasn't in bad shape. The textured glass was there and solid I have noticed that even though there isn't much damage the aluminum on all of the trailer's existing windows was starting to oxidize. It is a good thing they are getting attention now. I disassembled the windows and wet sanded all of the aluminum.

I picked up a 6" Craftsman Buffer from Sears the other day. WOW... what a difference it makes in polishing. I still use my drill and buffing cones to get into the hard to reach places but the 6" wheels really get the shine to come out quicker and is less mind numbing.

Once polished I put in a new Hehr gasket from VTS and reassembled the window using their Hehr Standard fasteners. I think it turned out real nice. The polish looks so much better than the last window.

Click on the pictures for a better view...
SHINY!!!
The details. You can actually read the Hehr LA Calif now...
One more down...

Friday, April 2, 2010

Quickie Update...

Because I know someone out there cares...
I'll be wet sanding until my hands fall off.

Thursday, April 1, 2010

I'm in a downright foul mood...

First: The Formica dinette table top epoxy experiment failed. The two part epoxy was just too thick and wouldn't spread out real thin for me. I attempted to squeegee the epoxy so it would lay down in a nice thin layer while filling the voids and making a nice shiny layer. This didn't work. It just started to streak. So ultimately the finish is uneven and rippled. No good.

I don't think even wet sanding would solve the problem. SOOOOO.... We are on the market for new laminate. Not really what I wanted to do but maybe this will be something that will be better in the long run. Now that the yellow Formica is going bye-bye we may even be changing the color schemes we had picked. The jury is still out.

Part two: Vintage Trailer Supply started carrying a new product. Now that isn't the bad thing. I'll explain. First the product...


This kit includes most of the small parts you need to refurbish your 1950s Bargman Trail-Lite license light.

Kit includes:
  • bulb socket with single pigtail
  • bulb
  • custom gaskets for both ends of glass lens
  • two stainless cover screws
Kit does not include:
  • main casting
  • clear glass lens
  • outer cap (red lens version sold separately)
  • license bracket (sold separately)

Awesome huh? Even has a decent price for $9.99. What is the bad part? The kit does not include the clear glass cylinder lens. Today while messing around with my Trail-Lite and trying out the new red glass outer cap lens the clear glass lens fell off the table and shattered. The lens was cracked but I was going to use it anyway with a cleaning and some epoxy to help that crack stay together. Not now.

Does anyone know where to get something that can act as the clear lens for the Trail-Light? There has to be some cylinder shaped object that can be modified to work. I looked through our spice cabinet looking for some container that could be cut to work. Nothing. I'm sure I may be able to find something that works somewhere. I just figure that someone else has solved this problem.

Nothing left to do but wet sand some aluminum... blah.

Monday, March 22, 2010

Space City Trailer Club Patch...

I picked up this trailer club patch off of Ebay. Finally got it today...
I'm not sure how old it is. The image of the trailer and the chain stitching suggest it is is 60's. Houston didn't receive the nickname Space City until 1967. I suppose folks could have been using the nickname before the city gave themselves the name? I dunno. I couldn't find anything about this club. I'm guessing they are defunct. I love the patch though...
It is a nice big patch too. 5.5 inches X 11 inches. Now I have to find a vintage style jacket to put it on. The weird part... I bought it from a guy in Canada. How did it get way up there???

Sunday, March 21, 2010

Dinette Table Resto...

Started work on the dinette table. The PO had covered the original yellow and gold flecked Formica with a thin white cheapo formica type stuff. You can see from the picture below there is quite a bit of glue still on the yellow Formica even after I scraped a bunch off...
This sucks. Thats all I can say...
A picture of nails? Yeah. This is something that should NOT be used anywhere near aluminum trim. Ring shank nails. WHY!?!?! Some days I wonder where some folk's heads are. Once they laid down the crappy white Formica stuff they reattached the trim piece with ring shank nails. As Red Dirt would say... this does not make me happy...

Once I got the aluminum trim off the top Formica comes right off. It is glued to Masonite. The Masonite is not attached to the plywood table. I found this logo. From what I can tell is that Roseburg is still in business but they don't make Resin-TITE anymore. I don't know why but I love finding stuff like this...

I spent some time with a scraper and a whole lot of Goo Gone. There is a few problems that need to be addressed...

There is a few deep scrapes and the dark spots. I tried to get the spots off but they aren't going anywhere. The gold flecks that are at the surface actually rust. 

I think the dilemma here is that we actually want the original Formica if we can keep it. We dig the vintage aspect of owning a vintage trailer. So keep the chewed up Formica or replace it? Thats the dilemma...
If we decide to keep the original it needs some protection. I was thinking of getting some of that 2 part epoxy that is made for bar tops. If it was nice and thin it could serve as good protection and fill some of those deep nicks and scratches. It won't get rid of the dark spots but maybe the dark spots add to the character. Maybe not. Maybe a material replacement is the better route. Anybody have any ideas? Let me know.

The table leg is a bit chewed up also. The damage is from a eye bolt in the floor. Not sure how to remedy this. I may sand the whole leg and turn it around so the deep scratches are facing the rear. That or replace the whole leg with new wood...
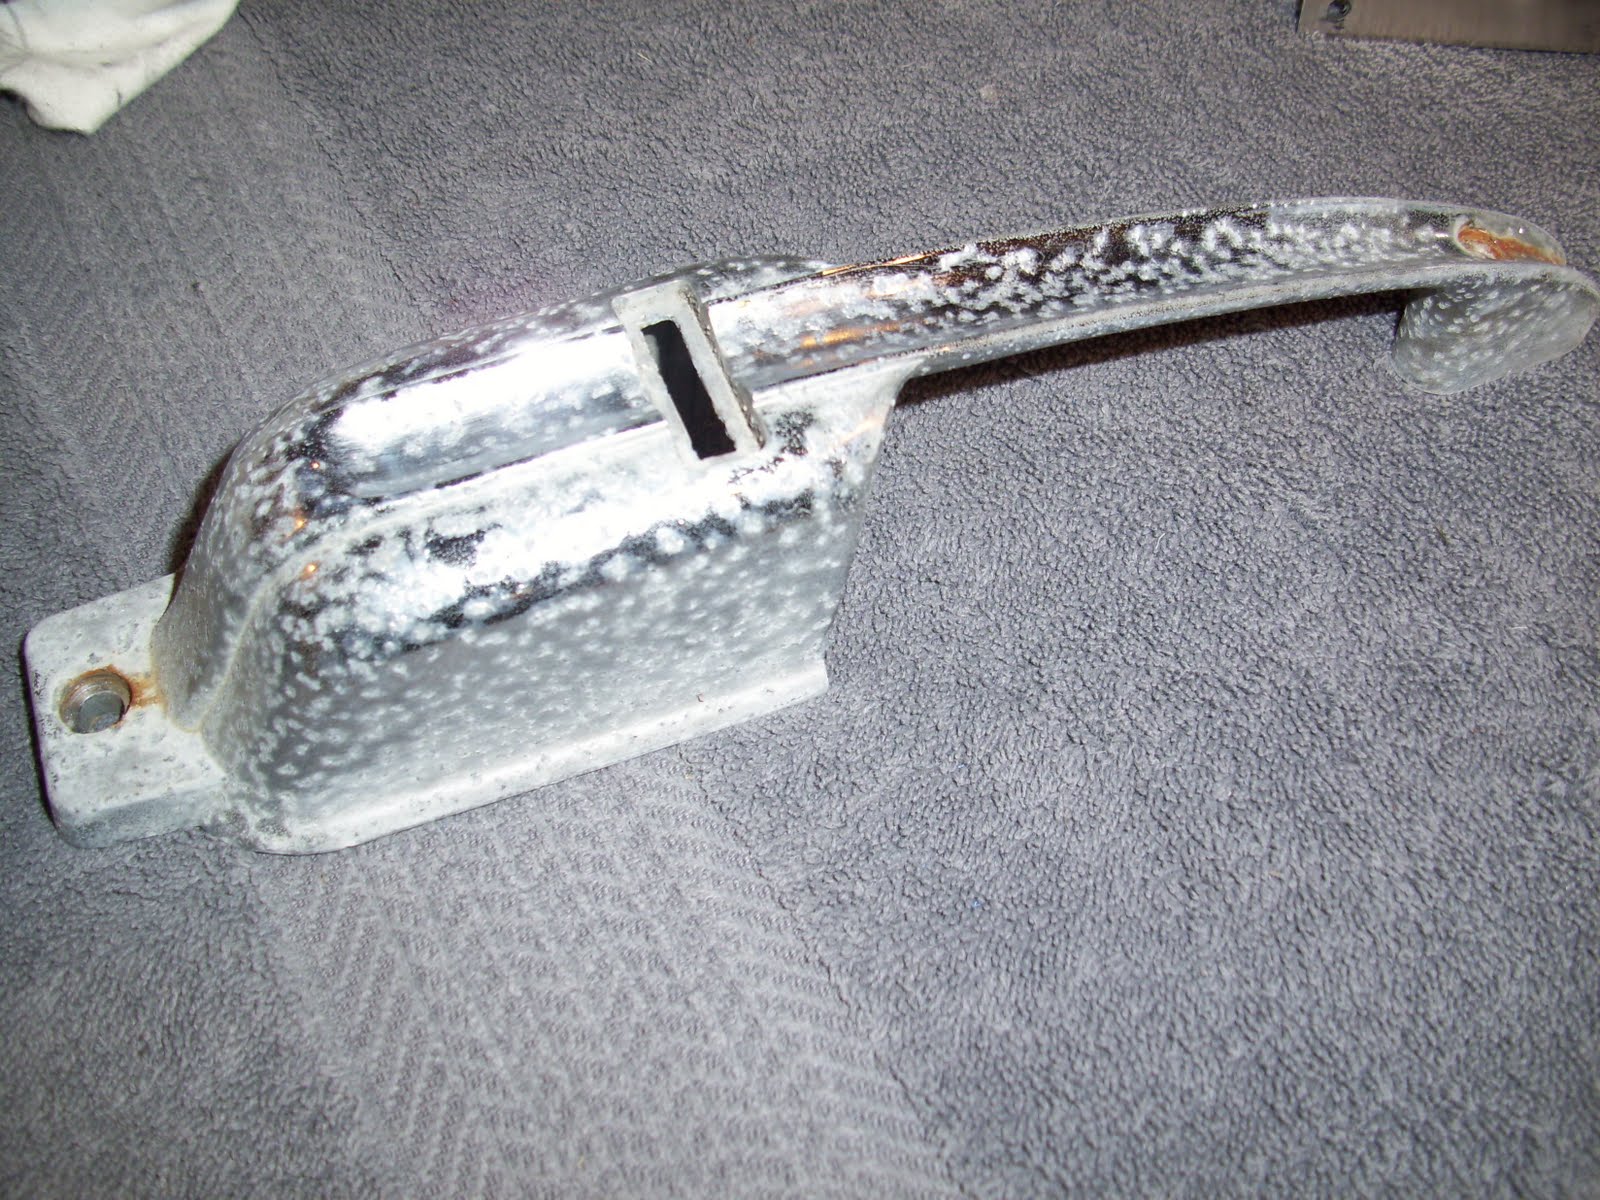
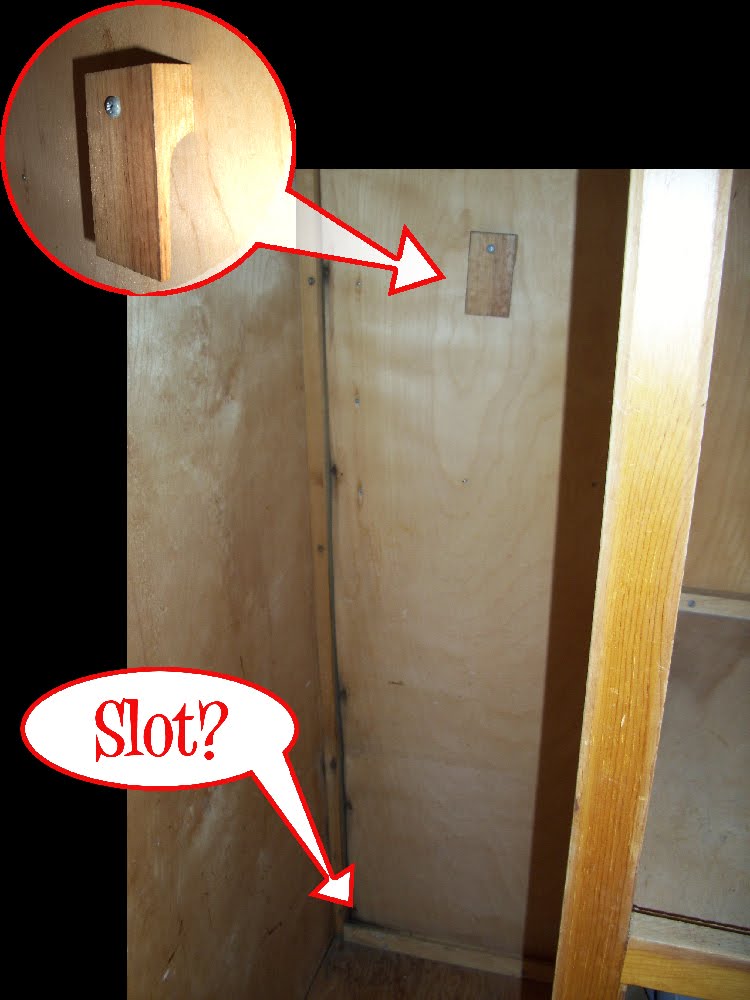
I'm also not real excited about this aluminum hinge on the leg. It isn't the most secure and a bit bent up. I bought a new heavier hinge to swap this one out. I also have to sort out a way to hold the leg in the down position without that stupid eye bold in the floor...

Even the aluminum trim was a pain. It is so big and awkward that polishing is a pain. But it is done. The areas around every hole is sorta messed up from pounding in those nails...

I need to come up with a few solutions before I move forward on the table. I will keep everyone posted.

Interior Trim...

Just a quickie post...

I pulled all of the interior aluminum trim pieces to clean, wet sand and polish. Mostly counter top trim. There is a sink trim piece and the roof vent trim piece there also...


The good ol' before and after shot...
They were a bit scratched up from general wear and tear but they will be fine. I can't wait to re install them. However, that is long down the list of things to do.

Tuesday, March 9, 2010

More Parts...

Not the most exciting thing in the world but I got a drip rail knocked out. Luckily the drip rail for the rear window that was removed for the AC unit was saved and found in the trailer. Here we go...

 Here it is in the raw. It isn't in real bad shape just needs a polish...
I started wet sanding with 400 grit and 600 grit. Finished up with 1500 grit. I did this all very quickly but it needed the corrosion removed...
It still had the dried putty on the back of the drip rail. I use a very fine wire wheel chucked in my drill to go at the crud. I only use the wheel on the back of the drip rail because I think the wheel is too aggressive for the front that I want to be very smooth and shiny. The point is to get nice smooth surface for the new putty to stick to when it is reinstalled on the trailer.
The backside cleaned of any residue...
Here is the front side again. Now polished. I'm still not happy with the final product but it is much better than when is started. Like I said before, the thinner aluminum does give up a real deep reflective shine that other thicker pieces do. Oh well.
This shot is only because I love the before and after shots...

One down... 8 more drip rails to go.