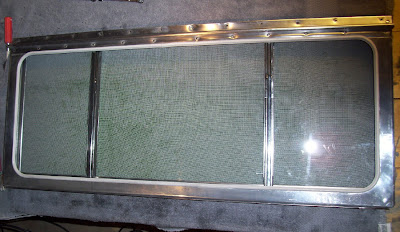
I had an opportunity to finish up work on the rear window. You can see part one here. A few more hours of work has brought me here...
I continued cleaning up the main inner and outer frames of the window. On the left you can see the inner frame when I got it. After it didn't shine up REAL well but it looks a lot better...
You can see the new replacement galvanized window screen from Vintage Trailer Supply is now installed. I had to use pop rivets to re install the retention "?" plate rather than the large tubular rivets that were originally on them. Works fine and it's hard to notice the difference. Those plates look good don't they?..These "U" shaped channels that support the inner window frame was one of the worst parts of this whole restoration. What a pain in the butt. They were really messed up but the hardest part is that they are small enough that it is almost impossible to get real good tools in there to clean out the corrosion. It took forever and it isn't great but it is better than before. The spring loaded plate now rides freely...
I had some new glass cut and I replaced the smoke damaged plexi-glass. I also installed the new Hehr standard glass seal and glazing tape from VTS. I did notice when trying to polish the frames and thinner pieces of the window that they didn't shine up as great as I liked. Oh well. What are you going to do? New nuts and screws from VTS. You can see some more of the corrosion that wouldn't leave...
Here you can see the glass frame joined with with the main frame...
Man... these things turned out nice...
And opened up...
One more beauty shot. I love it....
Ultimately, it took a lot of work but I'm pretty happy with it. Now on to more and more parts!


1 comment:
brian- im starting on my windows. how does the glazing tape work? how/where do i apply it.
jim
Post a Comment