Showing posts with label Wheels. Show all posts

Thursday, October 25, 2012

Exterior Updates

I finally had decent enough weather to drag the trailer out and take the updated pictures.

You will see from the pictures that I have some more work to do. I need to get new propane tanks and hook that system up. Need to make and mount new wings. Also need to do the final wiring for the exterior lights.

Ultimately, I am happy with the overall look of the exterior. The new paint looks pretty decent but a bit flat in spots. I will probably buff or wax the whole thing at some point. New decals look pretty good too.

No more rambling talk. More pictures. We will go with the old standby of before and afters...


Curbside window...

AC unit removed and replaced with a Airflyte window...

Bathroom Closet window...

Kitchen window...

Street side dinette window...

Front window. I added the decal above the window. The trailer didn't originally have one but I like how it looks so I went with it...

Entrance door. Biggest change is removing the hasp and added the deadbolt...

Interior of the entrance door and screen door...

Replaced that crusty latch with a new one...

Repainted step. I used skateboard grip tape that I had left over from another project. Cut it into Mid Century style stars to make it a bit more interesting to look at.

Taillights with new lenses from VTS.

Bargman Trail Light with new lens from VTS. Also has a new plate holder...

New marker lights...

Metal badge...

Reproduction green factory badge that I pushed VTS to produce...

Repainted MHMA badge...

Water fill...

I'm not sure I am digging the Mercury caps I found. They are ok. They don't fit all that well because they are well used. I'm still looking for another set that won't cost a fortune.


I think that is about it for now. I'm not sure if there will be much more progress before the crappy weather comes and stops progress all together...but stay tuned.




Wednesday, June 1, 2011

A Bit More Progress...

It has been awhile since my last post but I have been working a few hours here and there. Here is what has happened since my last post...

The door got put back together and sealed. Here I had taped off the "Z" stripe for polish...

I used the felt buff chucked in my drill and some brown compound to give it a good shine..

I then taped off the stripe and primed the door...
It is now set aside waiting for paint.

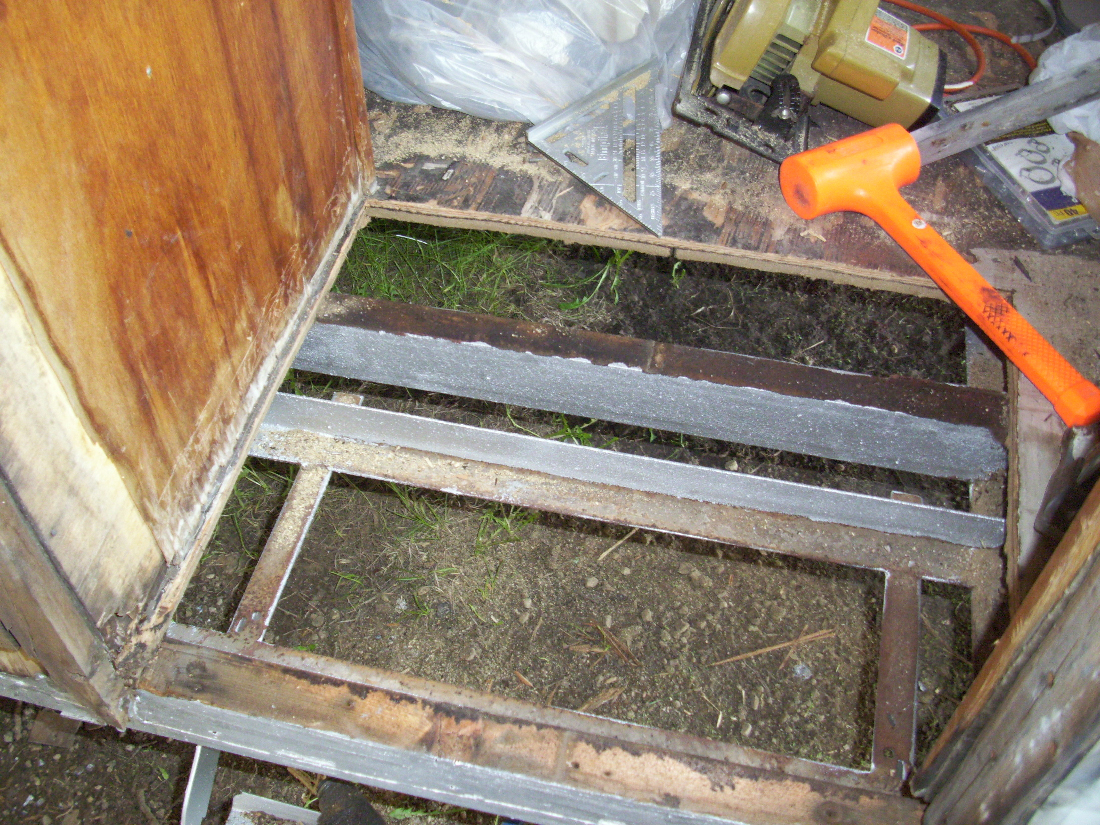
I removed the section of the floor where the leaky door had started to rot and delaminate the floor...

Let me apologize for the crummy pictures. I swear this camera is getting worse and worse. Here is the new section of floor installed...

You might have noticed that the closet panel was also removed. I didn't want to take this out but it is just too far gone..

I have been hunting for rot and trying to find it and remove it. Here is some more rot that must have come from a leaky black water tank vent cap...

I have also been tackling replacing the framing. I removed all of the rotted framing and tried to make the new framing more substantial. Here is the curbside done up to the door...

A before and after of the baggage door framing...

Again, sorry about these crappy pictures. Here is the curbside wheel well framing...

Here is the street side framing done all the way up to the front...

Once I was done with each side framing I went to the back to finish that up. I had bought a Hehr Standard window for the rear window which was gone. I had never really fit the window in the hole to because we had the rear window sealed up with plastic since we bought the trailer. It had always been in the back of my mind. Really because I wanted to see if the PO had altered the opening to fit the AC unit in the window opening. I didn't think that the actual replacement window wouldn't fit. Talk about a oh $#!@ moment. I study a lot about Shastas but even I didn't know (or even think) about the fact that an Airflyte would have a larger window than a 16 SC. Luckily, I discovered this at this point in the work. I just needed to make the opening larger to accommodate the bigger window. I removed all of the rear cross members to start fresh...

I redid all of the rear framing which was going to get redone anyway...

Going back to a few previously discussed items...

Here is a horrible shot of the grinding, priming and painting I did on the entire frame...
 I also did the wheel wells which probably benefited more from this. They are on the verge of rusting away. I think the rust removal and paint will keep them serviceable for a while. All of this sort of thing is really easier when you do a complete frame off but that wasn't in the cards this go around. I had to make due with the options I have. It was a lot of work to spend that much time under the trailer but I feel better knowing I have done what I can to make sure it isn't rusting away.

I also got the new tires mounted on the rims...
Again. These will probably end up another color but I can do that later. I am still hunting for a good buy on vintage 15" caps. I have really been eyeing up early 50's Oldsmobile caps. I like the design they had. Then again I keep seeing other caps on ebay that I like also. Maybe at some point I can have more than one set of caps and could change them out to suit whatever mood we are in.

I am sure I will have more updates soon. Stay tuned...

Wednesday, May 18, 2011

Another Late Night Post...

Lets get right to it...

I got my hubs finished finally. I removed the races because one was nicked and I thought it would be best to just redo both sides. It cost more than I had planned but it is peace of mind. After removing the races I took a flap disk and wire wheel  to the hubs. They were looking rough. Here they are after the rust removal...
I primed and painted them with Rustoleum Professional Aluminum paint that I have been using for the frame and other parts. The paint won't last for ever but what the heck. It will stop them from rusting into oblivion. I installed the new races, packed the bearings, installed the grease seals and mounted the hubs. I will try to post the numbers and sources of the races, bearings, and seals at some point. This might help someone I guess. Here is my favorite picture...before and after...
I received my grease seals and outer bearings and races in the mail just yesterday. Unfortunately, the bearing supplier didn't ship me two sets like I ordered so I was only able to assemble and mount one side.

I also stripped and wire wheeled the three wheels. I primed and painted them with Rustoleum Metallic Silver. That is what I had on hand from other projects...
They don't look to bad. I think they will get repainted at some point. Probably the Cloudburst color we have picked for the body of the trailer. It may not matter too much as I plan on running full caps. I am still looking for some vintage caps that won't kill me budget wise. We are now $268 over budget so finding nice but affordable caps are is a challenge.

I also have been banging out the entrance door stuff. I assembled the Bargman L-66. If you are taking your lock apart remember to grease the parts. I put it 80% together before I realized I hadn't greased anything. I don't think it looks that bad...

I still think these things are junk. I don't like them at all especially for the money they command. If you are repairing and cleaning your lock here is the exploded view to help you out...

I finally finished the interior door panel. It didn't go that smooth. I did two coats with the shellac thinned with denatured alcohol on the advice of a VSTF member. It was looking a little on the light side color wise and I got cocky and applied the third coat full strength. That did not go well. I had to sand all of the finish off and start over. IT SUCKED! I did it all again but stuck with the thinned shellac this time. I think it looks pretty good... 

You can see that I have dry fit the door lock. It took a ton of working on this. My "guide plate" broke in my hands so I had to fabricate a fix. Did I mention these locks suck? Here is the plate I had to make...
It seems to work. I spent WAY too much time making it and making it fit.

I got rid of the stupid hasp the PO put on and got us a RV door lock from VTS. Here is the dry fit of the deadbolt. I think it seems to work pretty well and looks a lot better than a hasp...
Sorry the picture is crappy. It was getting late. I stopped there because the shelter is about 15 feet from the neighbors bedroom window and I don't want to be a crappy neighbor and be hammering and drilling at 10 at night. Stay tuned for more...

Sunday, May 1, 2011

Jefferson Swap...

I realized 20 minutes into owning this trailer that we would defiantly need a spare tire for this trailer. The problem is there wasn't one with the trailer. Hence the crap we had to deal with when we had our first blow out. I wanted to keep the style of steel wheel like it had originally. I realized that after getting the tires removed from the wheels that one was original to the trailer and one was a replacement. My local shop said I should look for the newer version to match the replacement and use the original for a spare. Where would I find a used steel 15" wheel with a 5 on 4 1/2" bolt pattern and a 3 3/4 backspace? Good question. Jefferson Swap Meet maybe?

I haven't been to Jefferson Swap Meet in quite awhile. Usually the weather sucks when we have gone in the past. This year it was pretty nice and warm. My Dad went with me on the mission to find the rim and a set of hubcaps. Only about 3 or 4 rows in I saw a vendor just setting up set the sea foam green wheel down in front of me. I grabbed my tape measure and everything looked good. $20 dollars was all the vendor wanted. Not a bad deal. Here is the "new" sea foam green wheel on the right with our other two...


I need to find someone to media blast this things so I can paint them up. Something like powder coat would be the best option for a finish but that is at a minimum over $100. Too pricy for our budget. I will have to stick with paint.

There were actually a few vintage trailers that vendors where using at the show. I ran into a kind old man (If I remember right he said he was in his 80's) and his son that had a 1963 Shasta 16 SC that he had owned for a few years. He gave me a tour and we talked a bit about his trailer. It was in the typical shape for a Shasta of that age. Water damage and that sort of thing. It was pretty much all original. One thing that was different was that he had the front gaucho instead of the more typical dinette. He did add more modern 12v lights in a few spots inside. The only big downside is that he had cut the wheel wells larger so he could fit a different size wheel and tire on it. It wasn't the best feature on a trailer this age but it could be fixed by someone with skill. The SC had the optional heater in it and stated that is why he bought the trailer. He said he sold the canvas bunk that was almost brand new and sold off the Shasta script badge. My Dad popped the question if it had wings when he bought it. "Yeah, I sold those for scrap a few years ago" he said. Dad and I let out a groan and I told him that those things go for around $200 now a days. He tried to keep a poker face when he asked if that was the case. You could tell he was rethinking that decision again.

He also mentioned a story about the trailer having a spare tire carrier on the back and loosing that on a trip and not realizing it until he got home. That must have been interesting for someone following him. He said that he may be leaving the parts business soon and would no longer have a need for the Shasta. I gave him some contact info and told him if he wanted to sell it that I could probably find a buyer for him. Not sure what he would want to sell it for but I might be a decent deal for someone.

Ultimately I did not find any hubcaps. There were plenty to choose from at the swap. The problem is that they are usually branded by the car manufacturer. I am looking for something more generic. My choices were to do a full size generic cap or find some baby moons and maybe do a beauty ring also. I found a vendor selling new made baby moon caps that fit the Ford style rims but they suck. The new caps are made in Taiwan and not what I would say a quality product. They are very thin and the chrome seems thin also. The vendor was selling them in sets of 4. First off I don't need a full set for $65 bucks. At the most I need 3. The cap on the top of the stack was nice and shiny. If you picked it up and turned it over it had rust on it already. The next one on the stack had small scratches in the chrome and more rust. The third had a tiny dent in the face. That was all I needed to see. $65 bucks for brand new scratched rusty caps? I don't think so. I think most vendors online sell the same thin crappy caps. Of course there was a guy at the swap selling full 15" Moon style caps but when I decided to go back to see if he still had them they were gone. So the hunt is still on for some hubcaps of decent quality.

Sorry for the lack of pictures in this post but there isn't much to show. Maybe more next week...