Showing posts with label Formica. Show all posts

Tuesday, April 24, 2012

It's Been SOOOO Long... Part 2

I guess it is hard to know what to show next. But I will try to keep it in chronological order. Here we go...

- After installing the paneling and rebuilding the dinette platform cabinets, the rear goncho, and the nightstand... I sanded EVERYTHING. I do mean everything. That was quite a project in itself. There are so many surfaces that had old shellac that needed the finished knocked off to get ready for new shellac. I think I did around 4 or 5 applications of Bullseye Amber Shellac. Again. I don't have any progress pics of this. I apologize. The new finish is darker which isn't a bad thing. It does look much darker in the all of the pictures than in person....


-I remounted all the cabinet doors and drawers. I bought brand new chrome hinges. The old ones were not in the best of shape. The new ones while not seen as a big deal make a big difference. I am glad I made that purchase. I think I may have mentioned before that I got new drawer pulls as a Christmas gift. They are the boomerang pulls from Rejuvenation. Those pulls are a perfect reproduction of the kind Shasta used in their trailers. Unfortunately our pulls had been replaced at some point. I didn't really cry much about that because I knew Rejuvenation had the right pulls to replace our cheapo box store pulls. Here are the new pulls. I think they look great...


-Here is a finished Shasta magazine rack mounted. Not much to say. You saw the progress pics in the last post...


-I also had redone the sconces. They were brass but painted with gold paint. I stripped the paint and painted them with Duplicolor chrome. I don't mind brass in some applications but with all of the aluminum trim on the cabinetry the brass didn't make much sence at all. Here is one of them without the shade...
I really didn't take great pictures of them before or even after but here is one now redone and mounted along with the reconstructed and refinished Shasta magazine rack...

Here is one in the rear above the goucho...


- I gave some attention to the stove which wasn't in the best shape. I refinished all of the surfaces the best I could. The chrome trim was rusted and pitted. I tried to shine that the best I could. I just went with a brushed finish. The burners and grates were very rusted. I knocked off the rust and painted them with high heat barbecue black. Finally cleaned the inside the best I could but it wasn't that bad inside...


-I also tackled the formica. It is isn't actually Formica brand it is Pionite. Pionite Surfin' USA to be specific. I made all new sliding doors for the upper cabinets...

And the goucho sliders...


-We liked the original laminate but it was not in good shape. Burn marks, scratches, and dull spots weren't really doing it for us. We decided to replace it. I did the back splash in the same laminate. One thing that was never a feature in the original trailers. For some reason Shasta used white back splashes with plastic trim which I never cared for. I also extended the back splash up to the window. I just think it looks better that way. I also made new aluminum trim for the laminate. The original trim on the lip was redone and is still there. I just added to it. I think the additional trim aluminum looks good...


The fridge bump out...

I added an outlet to the fridge bump out. I think it will come in handy...
The sink of course...


- I also made new aluminum trim for the rear window because that was missing. I also made trim for the kitchen window because for some reason Shasta did that one window with wood trim. Aluminum looks better...


-Just of couple of more because I like the way this looks...


I think that is about it for now. I hope to make some more progress in the next couple of days. Stay tuned...


It's Been SOOOO Long... Part 1

It has been a long time since I have posted! June was a long time ago. Shortly after that last post it got HOT. I am sure everyone remembers how hot it got last summer. The shelter I work in is quite nice in bad weather but it holds heat like crazy. Probably 10 to 15 degrees hotter than the outside temperature. That's nice when it is 60 degrees. Not when it is up into the 90's. That put things on hold awhile.

After that our digital camera took a dump. Once the heat let up, I went back to work but the lack of a camera put the blog on the back burner. We got a new camera so it is back to updates. There is a bit of a backlog to cover so bear with me. Most of the things are now in a completed stage (or very close to with only minor things to do). For instance I don't have pictures of the cabinets and paneling in the raw right after construction. I only have them as they stand now with the new finish on them. Up to this point I have been trying to do in progress pictures but with no camera handy I just motored on. I apologize for that...

-I replaced all of the birch paneling that I had removed to get rid of the rot. I don't have any progress shots of any of this because of the digital camera issue but you can see which ones were replaced if you go back through the blog. I had a lot of the panels from when I tore them out so that wasn't real bad to get the new panels to fit. It takes some tweaking but it isn't real bad. The hard part was doing the trim work. I made a lot of the new trim myself trying to match the old stuff as best as I could. That coupled with some weird angles and contours made creating and installing the new trim pretty hard and time consuming all through the trailer...


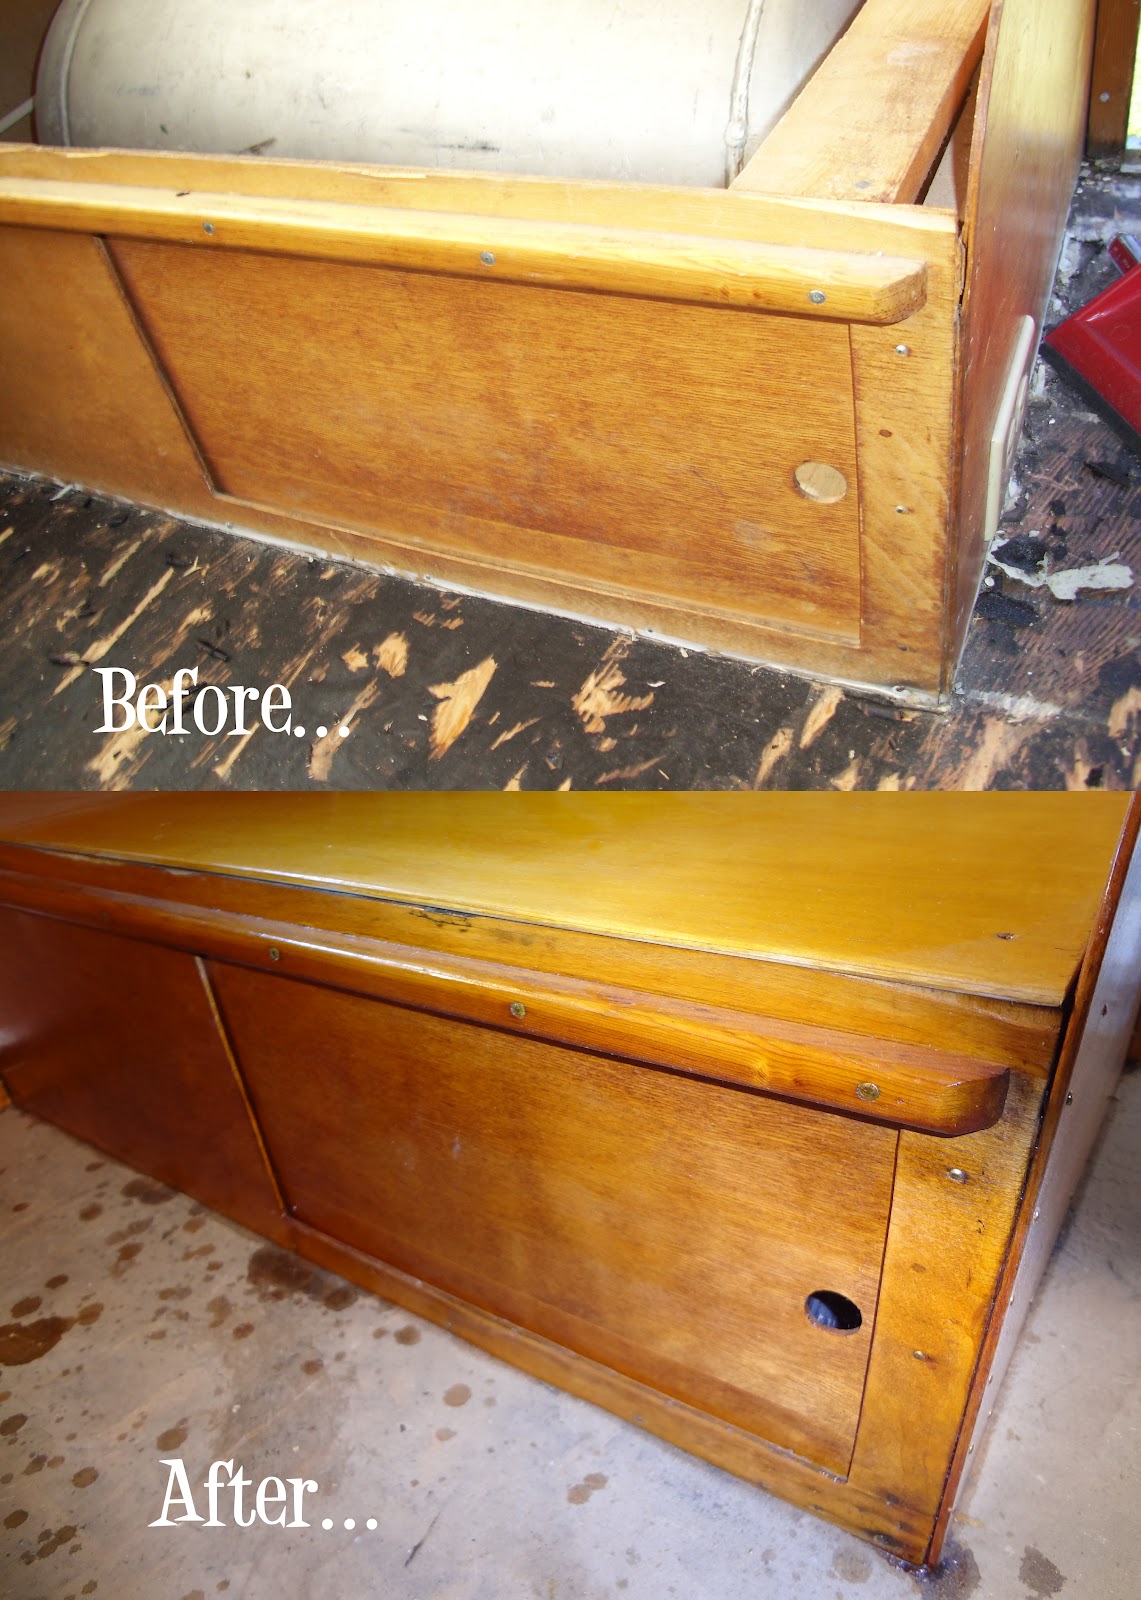
-I rebuilt both platform cabinets for dinette. I used the face frames and put all new lumber supports to make it more sturdy and fit better.

The street side with the drawer...


Curbside with the slide drawer. The plywood you see is new with the original face frame. The original plywood was destroyed from a leak from the door area... 
You can see that it didn't look that bad but when I started to take it apart it showed how bad the rot was in the area near the door. I also ditched that outlet...


Kept this outlet though. Replaced the outlet with a new brown one and a nice new chrome cover...


-I also rebuilt the back goucho platform also. Same deal. I used the original face frame and built new supports to make it a bit sturdier.


-Along with the goucho I rebuilt the tunnel and the nightstand. This area was toast. It was barely holding itself together. The doomed window AC unit created the moisture and dripping water that made this area delaminating mush. I could just pull the plywood of the tunnel off with my hands. That's not good...
As you can see I added a new angled aluminum strip to protect the edge of the tunnel. I figured that edge has potential to see some wear and tear. The plywood edges would be prone to chip out. This will help keep it nice...
Pretty much the only original part of the nightstand is the face frame. I rebuilt the whole thing. I also added the new laminate to replace the original top laminate. I thought it could benefit from the other two shelves getting the new laminate and aluminum trim also. I'll cover more on the formica later...

-I did some cabinet reconstruction and rehab to the rest of the kitchenette. The main bank wasn't too bad of shape. I did reskin the two upper cabinets that I had removed (you can see that here) because they were dry rotting and chipping like crazy. I don't really have any progress pictures of that process. Sorry.

Because the roof vent leaked quite a bit at one point there were some problems it caused. The water fell and hit the floor splashing up onto one of the doors. Or at least that is my theory because the door at the bottom of the kitchenette was delaminating and not in good shape. In had to remake this door with new plywood. Here is the new unfinished door behind the old nasty one. Sorry about the crap picture...


-I also did a bit of work on the magazine rack. It also was in rough shape. The face was delaminating as you can see in the picture below. I remade this with new plywood. Again, sorry about the crappy pictures...


I have a lot more to share but I will throw this part of the story up. The rest will be right on it's heels. Stay tuned for more...


Friday, May 13, 2011

Work...Color...Work...Patterns...Work...

Haven't had a blog post for a while.

I have been working hard on the trailer. Not much to show at the moment which is a bit frustrating. A few projects have been going on all at the same time. I have sanded, primed and started painting the trailer's frame from front to back. I have also wire wheeled the steel wheels and put on the first coat of primer. Sorry no pictures. I will cover that later.

I have also been busy buying parts and material left and right. We are hemorrhaging money. So much so that we are now $115 over budget. The sad part is we still have stuff to buy. Not good. Not good at all. It will all be worth it in the long run. Right? Anyone want to buy a kidney?

Because I don't actually have any projects completed I thought I would share the new interior scheme. Our laminate has seen better days we thought we would go with some new stuff. This spurred the whole change in the interior design. Here is the lineup...

First up: Paint. We picked Sherwin Williams Industrial paint for the exterior. "A" is a off white called "Marshmallow". The bottom color will be the "B" which is known as "Cloudburst".

"C" is our Pionite laminate called "Surfin USA".

"D" and "E" is marine vinyl for the seating made by Morbern.

"F" is our curtain material the "Daddy-O" in butter cream.

"G" is our flooring choice from Armstrong also known as "Butter Cream".

Lastly "H" is our awning from Marti is the Sunbrella pattern called "Easton Lagoon".

First I will say that the picture really doesn't represent the colors very well. They look much better and closer together in person. Just trust me on that. Yeah this is sort of a bush league post but I don't much to show for as much work as I have done lately. So... back to work.

Email me if you are interested in that kidney.

Thursday, April 1, 2010

I'm in a downright foul mood...

First: The Formica dinette table top epoxy experiment failed. The two part epoxy was just too thick and wouldn't spread out real thin for me. I attempted to squeegee the epoxy so it would lay down in a nice thin layer while filling the voids and making a nice shiny layer. This didn't work. It just started to streak. So ultimately the finish is uneven and rippled. No good.

I don't think even wet sanding would solve the problem. SOOOOO.... We are on the market for new laminate. Not really what I wanted to do but maybe this will be something that will be better in the long run. Now that the yellow Formica is going bye-bye we may even be changing the color schemes we had picked. The jury is still out.

Part two: Vintage Trailer Supply started carrying a new product. Now that isn't the bad thing. I'll explain. First the product...


This kit includes most of the small parts you need to refurbish your 1950s Bargman Trail-Lite license light.

Kit includes:
  • bulb socket with single pigtail
  • bulb
  • custom gaskets for both ends of glass lens
  • two stainless cover screws
Kit does not include:
  • main casting
  • clear glass lens
  • outer cap (red lens version sold separately)
  • license bracket (sold separately)

Awesome huh? Even has a decent price for $9.99. What is the bad part? The kit does not include the clear glass cylinder lens. Today while messing around with my Trail-Lite and trying out the new red glass outer cap lens the clear glass lens fell off the table and shattered. The lens was cracked but I was going to use it anyway with a cleaning and some epoxy to help that crack stay together. Not now.

Does anyone know where to get something that can act as the clear lens for the Trail-Light? There has to be some cylinder shaped object that can be modified to work. I looked through our spice cabinet looking for some container that could be cut to work. Nothing. I'm sure I may be able to find something that works somewhere. I just figure that someone else has solved this problem.

Nothing left to do but wet sand some aluminum... blah.

Sunday, March 21, 2010

Dinette Table Resto...

Started work on the dinette table. The PO had covered the original yellow and gold flecked Formica with a thin white cheapo formica type stuff. You can see from the picture below there is quite a bit of glue still on the yellow Formica even after I scraped a bunch off...
This sucks. Thats all I can say...
A picture of nails? Yeah. This is something that should NOT be used anywhere near aluminum trim. Ring shank nails. WHY!?!?! Some days I wonder where some folk's heads are. Once they laid down the crappy white Formica stuff they reattached the trim piece with ring shank nails. As Red Dirt would say... this does not make me happy...

Once I got the aluminum trim off the top Formica comes right off. It is glued to Masonite. The Masonite is not attached to the plywood table. I found this logo. From what I can tell is that Roseburg is still in business but they don't make Resin-TITE anymore. I don't know why but I love finding stuff like this...

I spent some time with a scraper and a whole lot of Goo Gone. There is a few problems that need to be addressed...

There is a few deep scrapes and the dark spots. I tried to get the spots off but they aren't going anywhere. The gold flecks that are at the surface actually rust. 

I think the dilemma here is that we actually want the original Formica if we can keep it. We dig the vintage aspect of owning a vintage trailer. So keep the chewed up Formica or replace it? Thats the dilemma...
If we decide to keep the original it needs some protection. I was thinking of getting some of that 2 part epoxy that is made for bar tops. If it was nice and thin it could serve as good protection and fill some of those deep nicks and scratches. It won't get rid of the dark spots but maybe the dark spots add to the character. Maybe not. Maybe a material replacement is the better route. Anybody have any ideas? Let me know.

The table leg is a bit chewed up also. The damage is from a eye bolt in the floor. Not sure how to remedy this. I may sand the whole leg and turn it around so the deep scratches are facing the rear. That or replace the whole leg with new wood...
I'm also not real excited about this aluminum hinge on the leg. It isn't the most secure and a bit bent up. I bought a new heavier hinge to swap this one out. I also have to sort out a way to hold the leg in the down position without that stupid eye bold in the floor...

Even the aluminum trim was a pain. It is so big and awkward that polishing is a pain. But it is done. The areas around every hole is sorta messed up from pounding in those nails...

I need to come up with a few solutions before I move forward on the table. I will keep everyone posted.